Memuat
Memuat
Want to go deeper?
Join one of our courses or ask us directly on WhatsApp.
Picked from the software, topic, and level of “AutoCAD House 6x10 Class #10: 3D Model Presentation”.
Other ways we can help with AutoCAD.
Learn with a mentor
Scheduled Architecture & CAD courses with live guidance and a certificate.

Course/Training Civil 3D — Mastering AutoCAD Civil 3D: Working with Corridors
★ 5.0 (3)

Vray 3.0 for Blender Course/Training
★ 5.0 (14)

Course/Training Rhino — Rhino Projects - 50+ Real-World Examples
★ 5.0 (14)
Have it built for you
No time to learn AutoCAD? Our team can do the project for you.

Development Service: Lumion — Lumion Course for Beginners
★ 5.0 (12)

Development Service: Rhino 3D — Using Ladybug and Honeybee in Rhino 3D for Energy and Daylight Simulation in Green Building Design
★ 5.0 (10)

Development Service: Blender — Desain Arsitektur & Animasi di Blender 3
★ 5.0 (10)
Get notified about new AutoCAD classes
At most one email a week. Unfollow anytime with one click.
The full narration of this video. The current sentence is highlighted while the video plays; click any sentence to jump there.
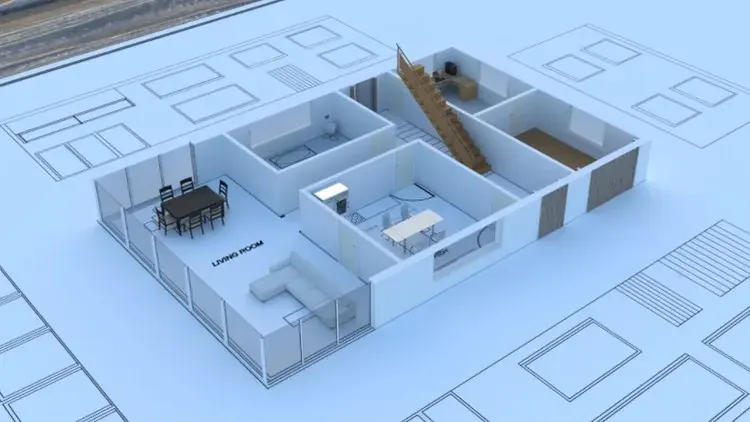
In this episode, the house model is presented with various visual styles, saved viewpoints, and as a closing we see a realistic render of the house in a sunset scene, complete with trees and a car. Hello, welcome to the final episode. We prepare the 3D model for presentation to the client, changing the visual style, hiding the plan with layers, rotating the model, and saving the viewpoint. Switch to the west-south isometric view with minus view SV ISO.
Try several visual styles with VS Karen, conceptual, hidden for hidden lines, shaded with edges, and realistic which displays layer colors with soft shadows.
To ensure the model does not mix with the plan, freeze all 2D layers at once with minus layer freeze and name A star. The star symbol selects all layers starting with the letter A zoom extends, now only the 3D model is displayed.
Rotate the model with 3D orbit, hold the left button and drag. Save this viewpoint with minus view option save, named front left. Rotate again to the right side and save as front right.
Saved viewpoints can be called anytime with minus view option restore. Very practical during presentation, because the viewpoint is always the same.
Finally, thaw the plan layers again with to, back to the top view, and zoom extends. The first floor plan, second floor plan, and 3D model are now complete in one file. This series is complete. Thank you for following from the first episode to the last. Want to master drawing house plans and 3D models in AutoCAD?
Cerdas Inovasi Digital opens AutoCAD courses for drafters and architects, work drawing services, house design, and realistic rendering, as well as selling this tutorial project file.
Want to master the entire series, from plans to 3D models and the roof?
All 10 episodes, complete with PDF step-by-step guides, are available for premium tutorial subscribers.
Subscribe now starting at Rp69.000 per month, save 28% with the 12-month package, or one-time payment of Rp999.000 for lifetime access.
Subscribe now on the premium page at cerdasinovasidigital.com. Contact us via WhatsApp, or visit cerdasinovasidigital.com. Thank you for watching, see you in the next episode.
Type a question or keyword; we find the part of this episode that explains it and jump the video there.
Notes are saved with the current video time and are only visible to you.
Stuck on a step? Ask here; the instructor and other learners can answer.
No questions yet.

Cerdas Inovasi Digital Team
Software developers, BIM & 3D engineers, and AI practitioners
We build software, BIM models, games and AI automations for clients every day, and turn that hands-on work into step-by-step classes: every step is shown on screen and comes with a PDF guide you can keep.
See our clients →