At most one email a week. Unfollow anytime with one click.
Transcript
The full narration of this video. The current sentence is highlighted while the video plays; click any sentence to jump there.
Show transcript
Introduction
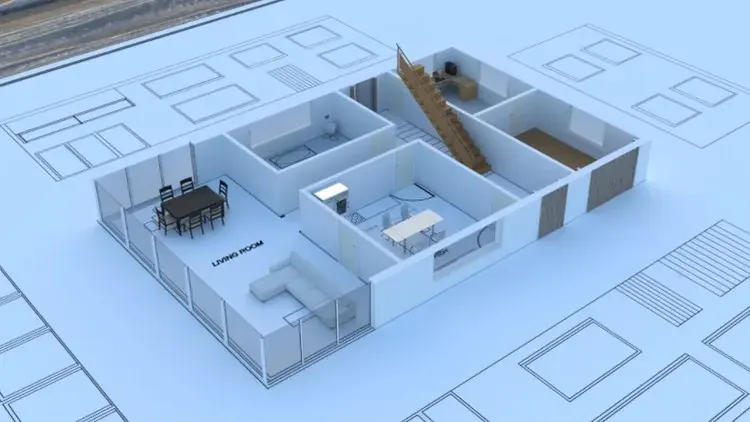
This is the final result of this episode, the 8x10m exterior wall made of 15cm plastered brick, and 6 interior walls dividing the living room, bedroom, kitchen, and bathroom. Everything becomes a 3D model directly. Let's start. Hello, welcome back to the ArchiCAD House with 3 Rooms series. In the previous episode, we already prepared units, story, and grid S. Today we start building the model, drawing the exterior and interior walls using the Wall Tool, while learning to use the Tracker to input the correct dimensions.
Step 1: Wall Tool Setup
Double-click the Wall Tool in the Toolbox to open the default wall settings. Wall height 3000mm, Home Story for the ground floor. In the Structure, select the composite plastered brick 150, which is half a brick with plaster on both sides, so the thickness becomes automatic 150. Place the reference point in the center, because the grid S is located on the center line of the wall. Click OK.
Step 2: Outer Wall method - Chain - Tracker
In the Info Box, select the geometry chain method so the walls connect automatically. Click the intersection of SA1 as the starting point, move the mouse to the right, then type 8000 in the Tracker and press Enter. Move up, type 10.000, Enter. Move to the left 8000, then back up to A1 and click the starting point to close the chain. Four exterior walls are connected neatly at the corners.
Step 3: Checking in the 3D window
Press F3 to open the 3D window. The exterior walls set at 3 meters are standing as beam elements, not just lines. Rotate the view with Orbit to see the clean corner connections. Press F2 to return to the plan view.
Step 4: Inner Wall 120 mm
Now the interior walls. In the Info Box, change the structure to plastered brick 120 and make sure the thickness is 120. Draw a chain from SB1 up 4000 to B2, then to the right until SD, as the boundary of the main bedroom. Then the wall SC from 2 to 4 along 6000, the wall S3 from C to D, the bathroom wall from 3000 to C in S3, and the western bathroom wall along 3000 to S4.
Step 5: Wall Connection and Hotspot
Notice the connection of the interior walls to the exterior walls. Archicad automatically merges boundary hatching because the structure is the same, so there are no cross lines at T-junctions or corners. Click on one wall to select it. The black dots are hotspots to change the length, and the info box displays the wall thickness and height.
Step 6: Room Arrangement in 3D
Open the 3D window again and slowly orbit around. We can now read the spatial layout of the house, the living room and the main bedroom in front, the family room and bedroom 2 in the middle, and the kitchen, bathroom, and bedroom 3 in the back. Save with the S key.
Done!
Done. We have set up the wall tool with a composite structure, drawn the exterior walls using the chain and tracker method, added interior walls, and checked the result in 3D. In the next episode, we will install doors and windows. Working on a house design, architecture studio task, or civil engineering final project? Cerdas Inovasi Digital helps with residential house design, complete working drawings, Archicad and Revit BIM models, up to 3D visualizations, and also opens Archicad and BIM courses. Want to master the entire series, from project setup to working drawing layout and IFC export? All 8 episodes, complete with PDF step-by-step guides and project model house files, are available for premium tutorial subscribers. Subscribe starting at Rp69.000 per month, save 28% with the 12-month package, or pay once Rp999.000 for lifetime access. Want just one class? Buy a single class with lifetime access. Subscribe now at the premium page cerdasinovasidigital.com Contact us via WhatsApp, or visit cerdasinovasidigital.com Thank you for watching, see you in the next episode. Thank you for watching!
Ask the class material
Type a question or keyword; we find the part of this episode that explains it and jump the video there.
My notes
Notes are saved with the current video time and are only visible to you.
Questions & answers
Stuck on a step? Ask here; the instructor and other learners can answer.
No questions yet.
Your instructor
Cerdas Inovasi Digital Team
Software developers, BIM & 3D engineers, and AI practitioners
53 video classes1,286 episodes
We build software, BIM models, games and AI automations for clients every day, and turn that hands-on work into step-by-step classes: every step is shown on screen and comes with a PDF guide you can keep.